
Furniture flips are beloved by DIYer’s everywhere. Why? Because you get to see a complete transformation. You take usually a very cheap piece of furniture and breathe new life into it. These projects are generally more accessible & less complex than building something by yourself. Generally being the key word there.
I of course decided to make something very complicated out of this furniture flip. A client approached me wanting me to build her a wine cart for her business. Due to the high cost of building materials currently, the client & I decided on a furniture flip for the cart.
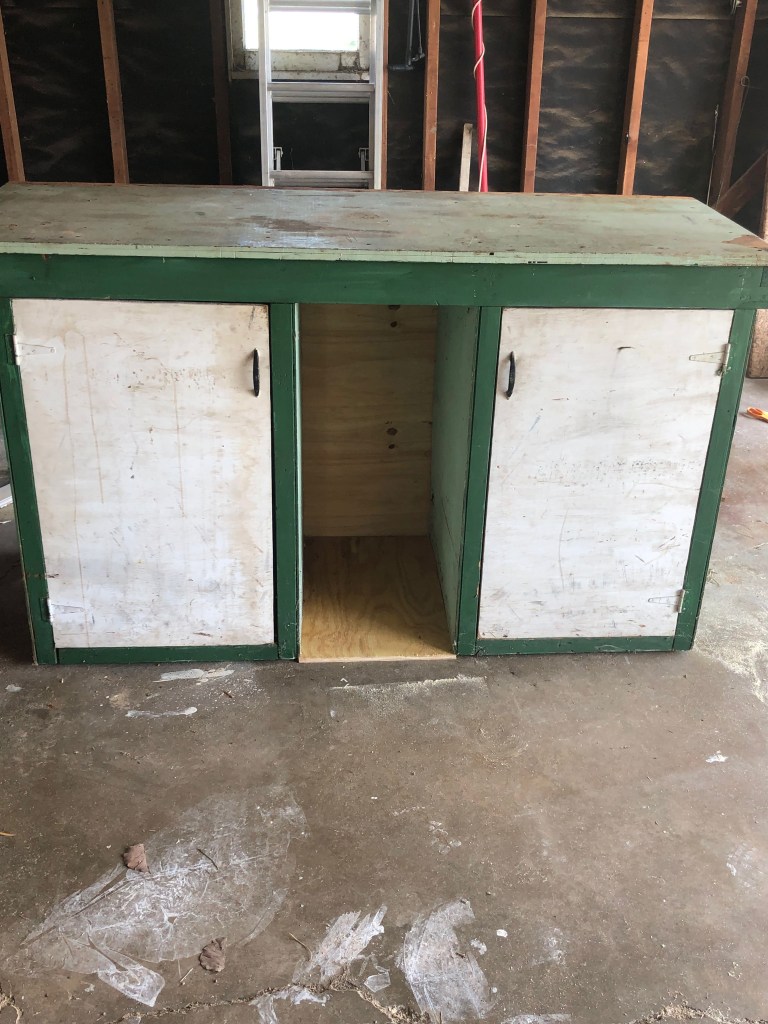
Now if you’ve been following me on social media or read past blog posts, you know that I have pretty much only done builds from the ground up, apart from a few small refresh projects like the concrete coated countertop. That meant that this was a brand-new task for me all together. The cabinet that we found offered a lot of storage but was in rough shape. It takes some imagination to picture a falling apart, paint chipping cabinet as a sleek cart, but I was ready to try this new task.
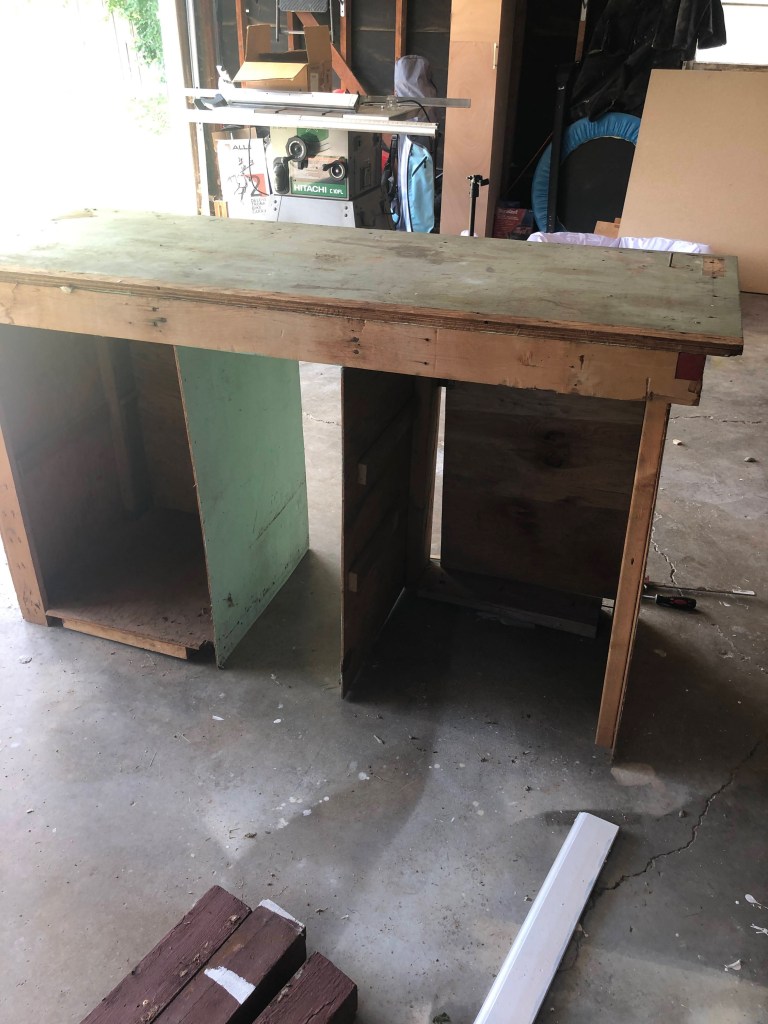

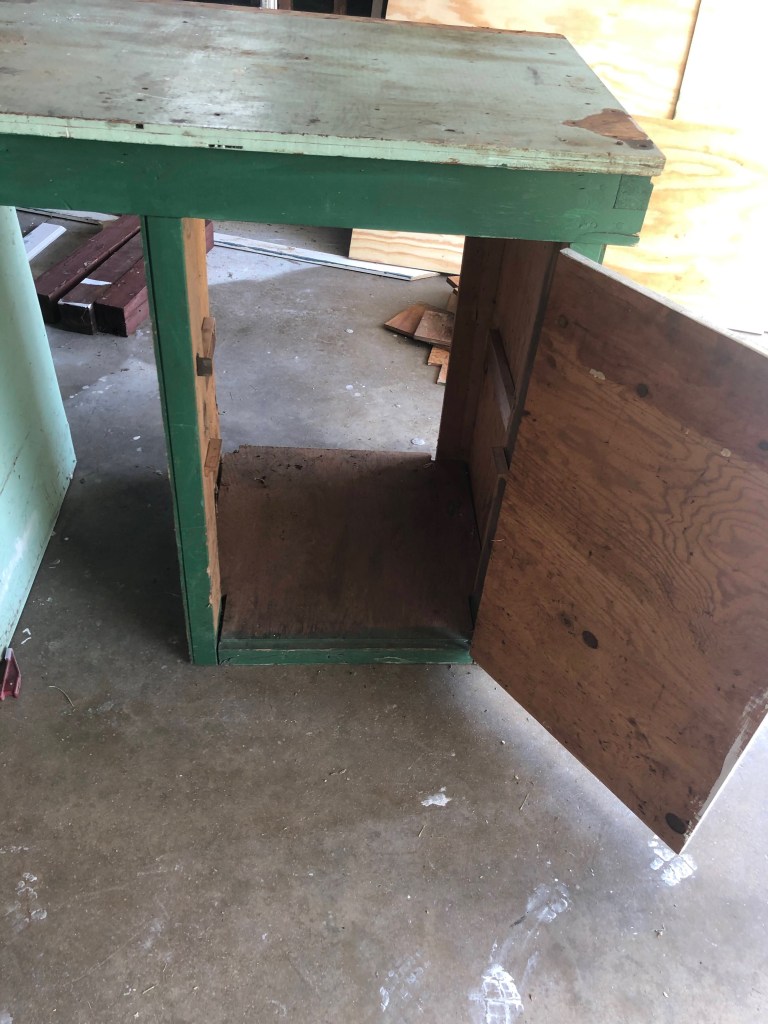
I knew immediately I needed to work on the structure, so I added a base, front piece, shelves, & sured up everything that remained with plywood. It’s a little different than what I’m used to because you have to measure to the exact size of an existing piece. It gave me a chance to practice cutting out detailed corners with my jigsaw. I attached everything with wood glue & screws for added stability. Then I did my typical wiggle test where I shake the piece a bit to see if anything is loose.

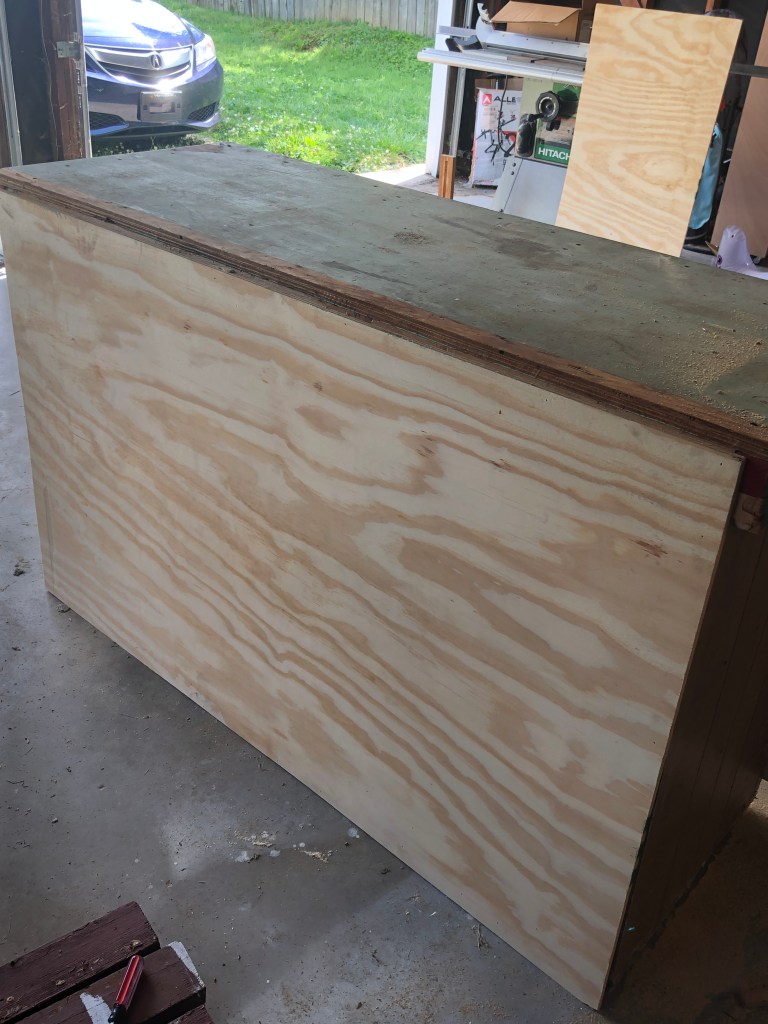
Next, the details. This meant a lot of sanding. Since this piece is made of wood, I could just start with a low grit sandpaper to remove the paint & work my way up to a higher grit to smooth everything out. If the piece were made of MDF or particle board, I would’ve had to strip the paint off rather than sand. I also filled in any holes with exterior grade wood filler and sanded those down too.

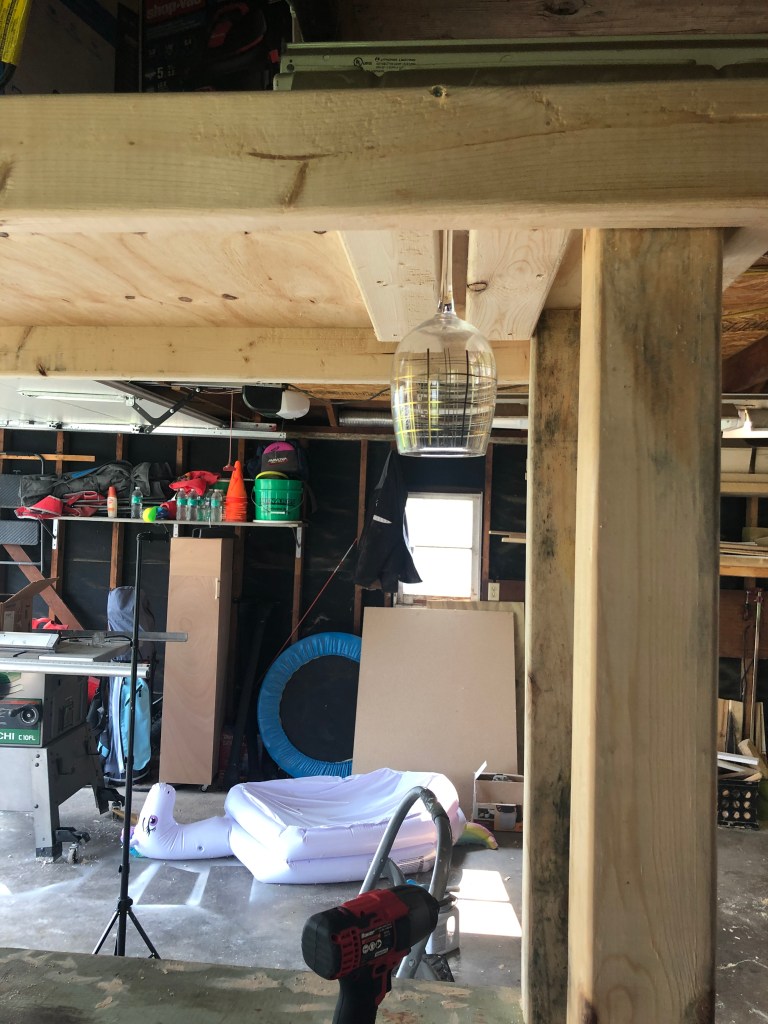
The part of this transformation that took it from a cabinet to a cart was adding wheels & an awning. I built the awning completely from scratch using plywood, 2×4’s and 4×4’s. The 4×4’s were needed for stability to support the entire awning. The 2×4’s added sides to the awning. I also routed out a notch in some of the 2×4’s for hanging glass storage. This was one of my favorite custom features.


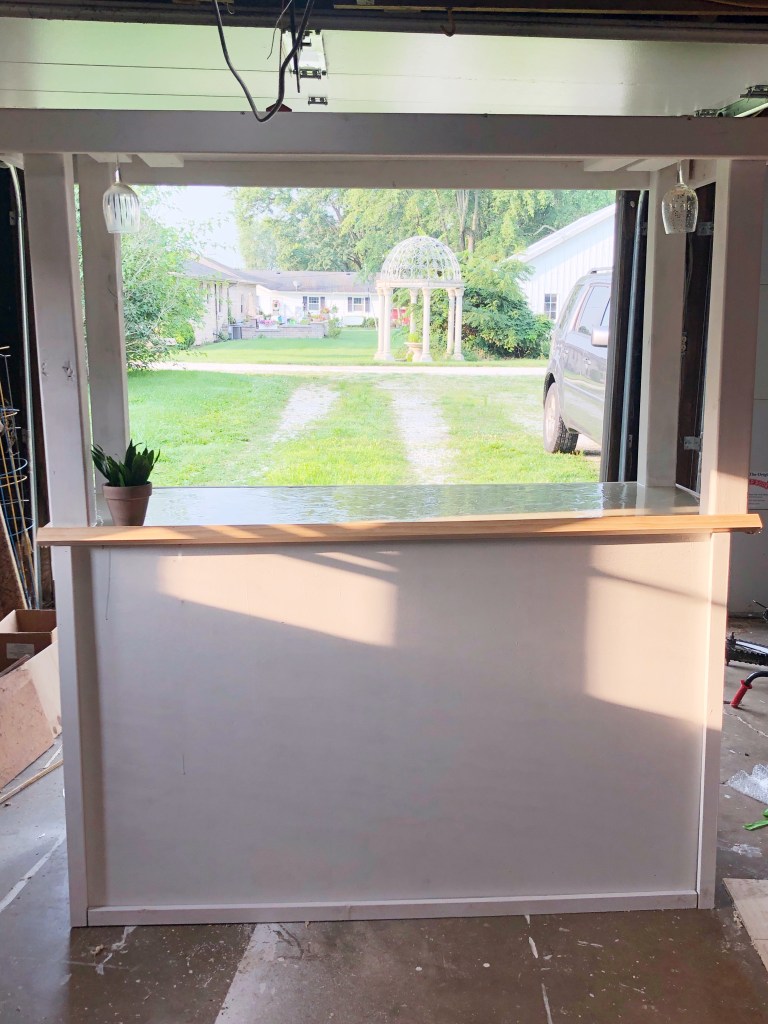
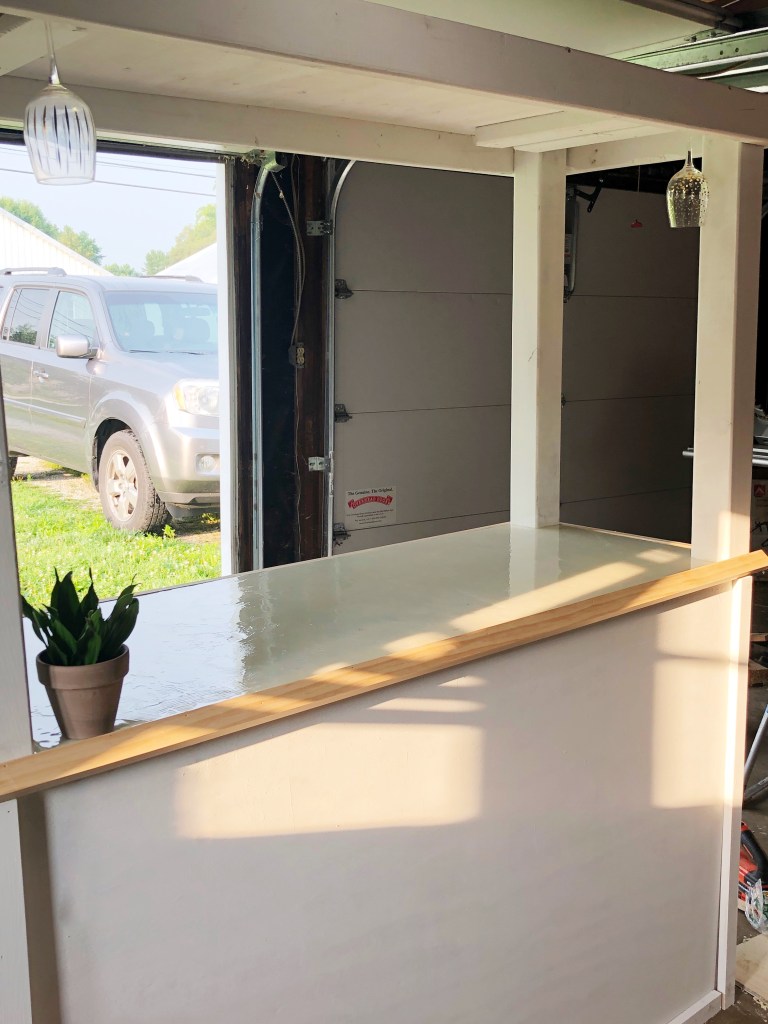
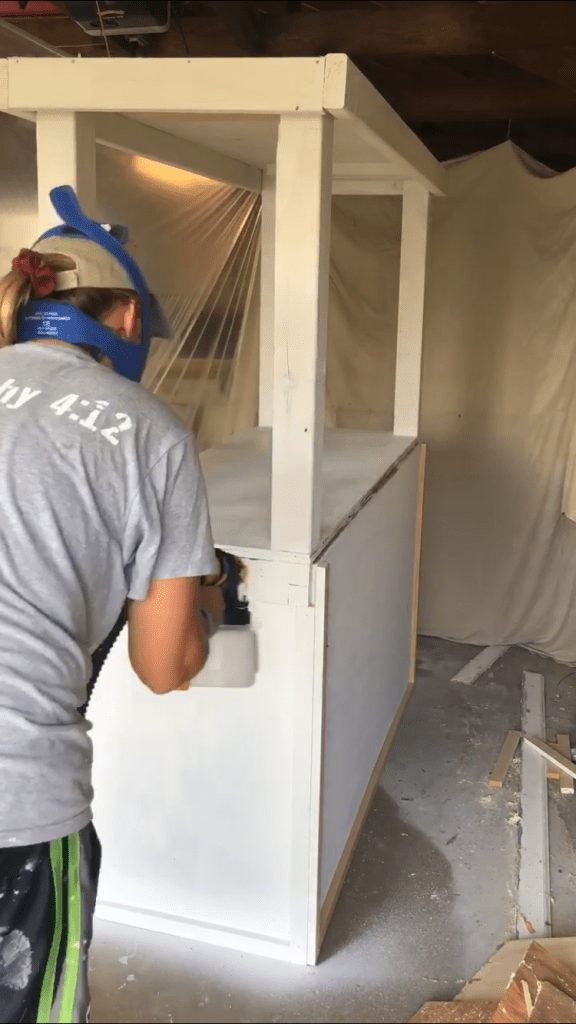
Last, most good furniture flips involve some sort of finishing. For this project that meant a good coat of exterior grade white paint on everything, and an epoxy coated countertop. The client & I knew that the countertop would need to be wipeable, and since they wanted to keep it plain white, epoxy was the best weather resistant surface.

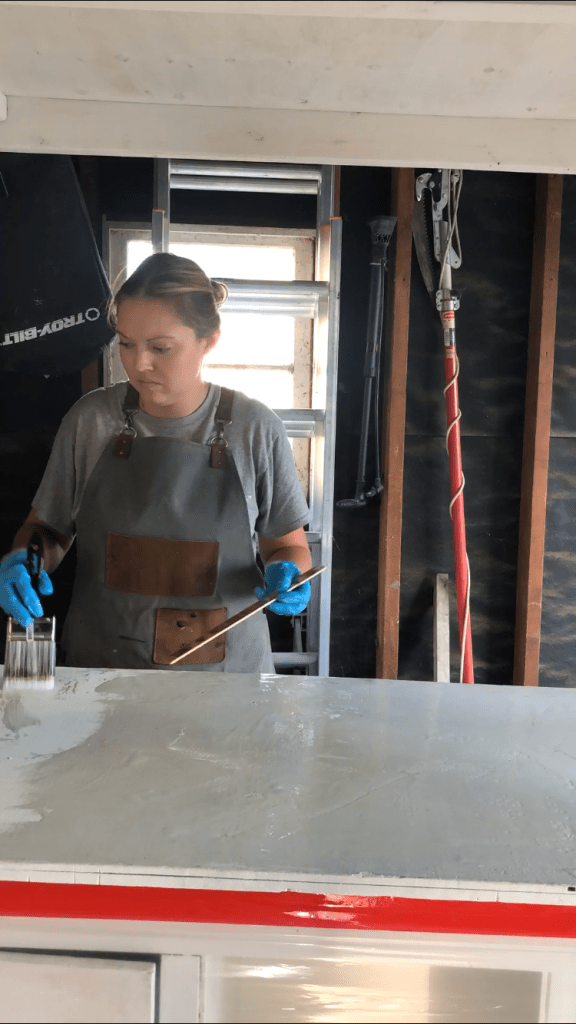
I used TotalBoat epoxy because I got to take a class with them at Haven conference, so I was familiar with the product. With epoxy you want to look for product that’s no VOC’s so you’re not breathing in anything harmful, keep hair or long sleeves pulled back, and always wear gloves. Following the manufacturer’s instructions is the best advice to keep you safe and not start a fire. For this countertop it was just two simple coatings, one to fill any pores in the wood, and then a flood coat on top. For exterior applications such as this one, you also need to apply varnish to make the piece UV resistant. This was the final step to making this flip a success.


This project stretched me in a lot of ways. I’m glad I stepped out of what I normally do, and I’m proud of how it turned out. It’s so healthy to challenge yourself to continue to grow & learn new skills. I’m not going to lie and tell you it all went perfectly, or that there weren’t moments of frustration, for example when I was wondering how the cabinet could absorb so much paint. But the lessons learned grew me as a creator. Would I flip another piece? It’s not off the table.